
When you first start working as a travel advisor, it is incredibly easy to get overwhelmed by all the new paperwork, software, and booking systems you need to master. Adding social media marketing to that list can feel completely daunting. After all, what does Instagram have to do with booking a complex international itinerary? How does Facebook actually help build your travel business?
The truth is, having dedicated social media accounts for your business is one of the most powerful ways to augment your online presence and put a relatable, human face to your brand. For small business owners, tapping into a larger social network provides unparalleled reach, visibility, and engagement opportunities. It allows you to grow organically, build an ironclad industry reputation, and place yourself one massive step ahead of the competition.
It is surprising how many travel advisors still struggle with the idea of creating their online profiles. Some feel it is just an exhausting additional task, while others simply do not know where to begin. If you are ready to stop leaving money on the table, here is your essential travel agency social media setup guide to launch your brand online.
Why Social Media is Non-Negotiable for Travel Brands
At its core, social media is a digital landscape where people connect, share ideas, and learn from one another. It allows individuals to get involved in their community, share their unique experiences, and feel like they belong to something bigger than themselves.
More importantly for you, it is where your clients are already spending their time.
Social media allows you to build deep, ongoing relationships with your travelers. When your clients are searching for a new destination or want to see what is trending in the world of luxury travel, they can turn directly to your page for inspiration. If you have a client who loves to travel, they will absolutely enjoy seeing the aspirational places and properties you showcase.
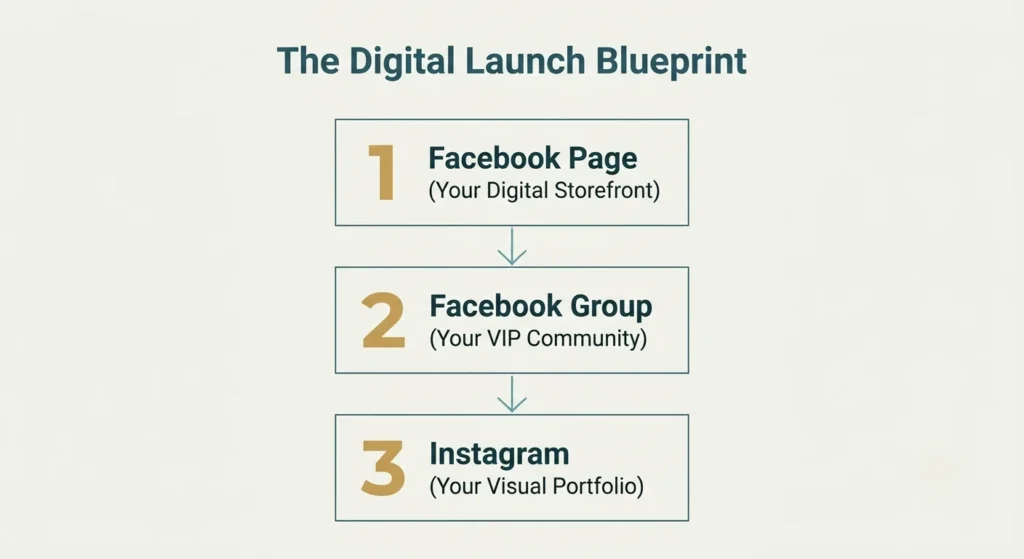
Step 1: Establishing Your Facebook Business Page
A Facebook Page acts as your primary digital storefront. You can utilize this page to interact exactly as you would as an individual, but you are doing it officially as your business entity. You can follow supplier partners, join industry groups, and host virtual events.
Here is what you need to set up your Facebook Page properly:
1. A Business Name and Description You should name your Facebook Page after your travel agency (or the specific name clients will search for to find you). Use the “About” section to clearly articulate what your business does. If you focus on a particular niche market—like luxury honeymooners or adventure travel—this is exactly where you want to highlight that expertise.
2. Branded Profile and Cover Photos Choose photos that flawlessly represent your business. The industry standard is to use your official agency logo as your profile photo. For the cover photo, choose a high-resolution image of a stunning destination, your team, or a graphic from your current marketing campaign.
3. A Clear Call-to-Action (CTA) At the very top of your Page, you can add a CTA button that directs visitors to take immediate action, such as visiting your website or calling your office directly.
Need step-by-step technical guidance? Here are some quick links provided directly by Facebook to get you started:
- Set Up a Facebook Page
- Understand Facebook Page Basics
- Managing Facebook Page Settings
- Create and Boost Posts on a Facebook Page
- Use Facebook Messenger with a Facebook Page
Step 2: Building Community With Facebook Groups
While your Facebook Page provides a newsfeed and broadcasting capabilities, a Facebook Group is a powerful way to build a collaborative, highly engaging environment for your VIP clients.
A Facebook Group is where you can easily foster two-way discussions. Many top-tier travel advisors use private Groups to promote exclusive supplier deals, organize escorted group trips, and allow their clients to share travel photos with one another.
Creating a Group is incredibly simple. The biggest decision is choosing a catchy name and deciding whether your personal profile or your Facebook Business Page will act as the primary administrator.
Start building your community here:
Step 3: Visual Storytelling on Instagram
Instagram is a community built entirely on the power of visual storytelling. Travel advisors use Instagram to share breathtaking photos and short-form video Reels, paired with engaging captions and strategic hashtags, to get directly in front of their ideal clients.
Starting your agency’s account is quick and highly intuitive:
Step 1: Download and Register Download the Instagram app. You can sign up using an email address, a phone number, or by linking it directly to your Facebook account.
Step 2: Optimize Your Bio Your bio is prime real estate. Tap “Edit Profile” and write a compelling explanation of who you are and the specific luxury services you offer. Be sure to include a link to your website or your contact form here!
Step 3: Upload Your Logo Brand consistency is key. Upload a high-resolution version of your company’s logo as your profile picture so clients instantly recognize your brand across all platforms.
Step 4: Switch to a Business Account This is a critical step! Go to your profile settings, tap “Account,” and scroll down to select “Switch to Professional Account.” Choose the “Business” option. This unlocks vital backend analytics, allowing you to track exactly how many people are viewing and engaging with your posts.
Explore these helpful Instagram resources:
💡 TARC Tip: Work smarter, not harder! Link your Facebook Page and your Instagram account together in your settings. This allows you to effortlessly cross-post your content to both platforms simultaneously, cutting your marketing workload in half.
Step Into the Digital Spotlight
Social media enables travel advisors to gain a massive competitive advantage by creating deep customer loyalty, generating organic word-of-mouth marketing, and ultimately driving new business. Keep in mind that you do not have to use every social media platform in existence; simply find the ones that resonate best with your ideal client demographic and master them. Start setting up your digital storefront today, and watch your brand authority soar.